You know that feeling when you finish your foundation and it looks good in the mirror, but then you step into natural light and suddenly see streaks, patches, and a texture you did not sign up for? It is frustrating. You spent time and money on the right shade, the right formula, and still your skin looks more “done” than “naturally flawless.” The good news is the problem is rarely the product. It is usually the tool and the technique. And the solution is simpler than you think.
The secret to a makeup sponge airbrush finish is not a fancy sponge or expensive foundation. It is how you prep the sponge and how you move it across your skin. By using a damp sponge with the right water ratio and a pressing motion instead of swiping, you can eliminate streaks, reduce product waste, and get that soft, diffused look that mimics a professional airbrush machine. This method works for liquid, cream, and even some powder formulas.
Why Your Current Sponge Technique Is Falling Short
Most people use a makeup sponge the same way they use a brush. They swipe it across the face. That motion pushes foundation into fine lines and creates uneven coverage. A sponge is designed to do the opposite. It should bounce and press product into the skin, not drag it around.
Another common issue is using a dry sponge. A dry sponge acts like a paper towel. It soaks up your foundation before it ever reaches your face. You end up using more product and still getting a patchy result. The makeup sponge airbrush finish relies on a damp sponge that is saturated enough to repel excess liquid but not so wet that it dilutes your foundation.
The Exact Hack That Changes Everything
This hack went viral on TikTok for a reason. It is not complicated, but it requires precision. Here is the step by step process.
- Soak the sponge completely. Run it under lukewarm tap water until it is fully expanded. Do not just wet the tip. Let the whole sponge absorb water.
- Squeeze out the water five times. This is the critical part. Wrap the sponge in a clean towel and squeeze firmly. Repeat until no more water drips out. The sponge should feel heavy and damp, not dripping.
- Apply foundation to the back of your hand. Do not dot it directly on your face. Warming the product on your hand helps it blend more smoothly.
- Dip the round side of the sponge into the foundation. Do not press hard. Let the sponge pick up a thin layer.
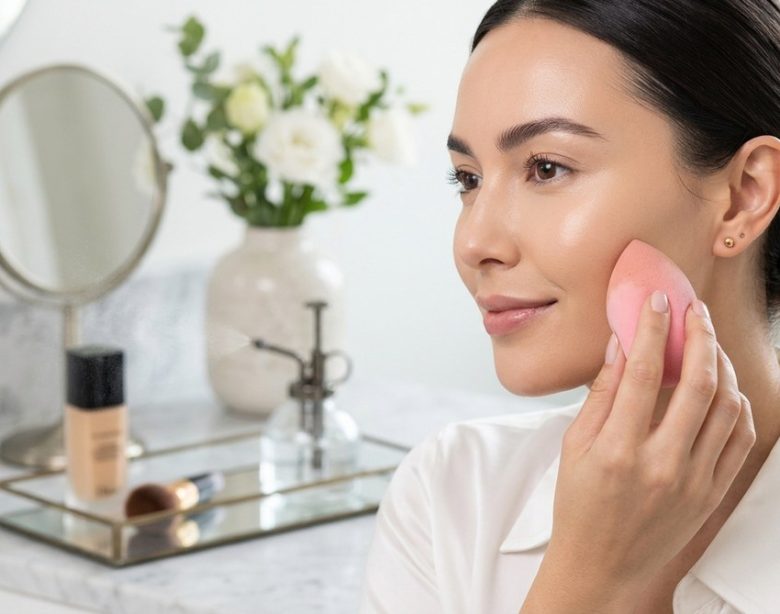
- Press and roll the sponge onto your skin. Use a gentle bouncing motion. For the cheeks and forehead, use the large round side. For the nose and around the eyes, switch to the pointed tip.
- Build coverage in thin layers. If you need more coverage, wait 30 seconds for the first layer to set, then repeat steps 4 and 5. This prevents cakiness.
The key difference between this method and your usual routine is the “press and roll” motion. You are not painting. You are stamping the foundation into your pores and fine lines, which creates a smooth, diffused surface that reflects light evenly.
Choosing the Right Sponge for the Job
Not all sponges are created equal. The material, shape, and density all affect the final result. Here is a comparison of the most common types and what they do best.
| Sponge Type | Best For | Common Mistake | Result If Done Wrong |
|---|---|---|---|
| Classic teardrop sponge | Full face application | Using it dry | Absorbs too much product, patchy finish |
| Flat edge sponge (beauty blender style) | Contour and concealer | Swiping instead of pressing | Drags product, creates streaks |
| Microfiber sponge | Sheer coverage | Overloading with foundation | Looks cakey and uneven |
| Silicone sponge | Liquid and cream products | Using with powder formulas | Product slides off, no adhesion |
| Latex sponge (disposable) | Precise spot concealing | Reusing without cleaning | Bacteria buildup, breakouts |
For the makeup sponge airbrush finish, a classic teardrop sponge made from hydrophilic foam (the kind that expands when wet) is your best bet. It holds the right amount of water and releases product evenly.
Common Mistakes That Ruin the Finish
Even with the right sponge, small errors can sabotage your results. Here are the most frequent ones and how to fix them.
- Skipping the towel squeeze. If you only squeeze water out with your hands, the sponge stays too wet. Your foundation becomes thin and watery. Always use a clean, lint free towel.
- Using too much pressure. Pressing hard does not give you more coverage. It pushes the foundation into your skin unevenly and can cause irritation. Use light, gentle bounces.
- Cleaning the sponge with soap that leaves residue. Some liquid soaps leave a film inside the sponge. That film can mix with your foundation and change its texture. Use a dedicated sponge cleanser or a gentle bar soap.
- Applying foundation in a hurry. Rushing the process leads to skipped spots and uneven layers. Give yourself at least three minutes for the application alone.
“The biggest mistake I see is people treating their sponge like a brush. A sponge is a stippling tool. You have to bounce it. If you drag it, you lose the airbrush effect completely.” (Senior makeup artist, New York Fashion Week)
How This Hack Saves You Money
An airbrush machine costs anywhere from $100 to $500, plus the cost of the special foundation that goes with it. This hack gives you the same soft focus finish using tools you probably already own. You also use less foundation because the damp sponge does not soak up as much product. A bottle that used to last two months can stretch to three or four.
If you want to extend the life of your sponges, wash them after every three uses. A clean sponge performs better and lasts longer. For more tips on building a solid skincare base that helps your foundation look even better, check out our guide on how to build a simple 3-step skincare routine for absolute beginners. Prepped skin is the best canvas for this technique.
A Simple Routine for Busy Mornings
If you are short on time, here is a condensed version that still delivers the makeup sponge airbrush finish.
- Wet the sponge and squeeze it five times with a towel. (30 seconds)
- Apply a pea sized amount of foundation to the back of your hand. (5 seconds)
- Dip and bounce the sponge over your face, starting at the center and working outward. (90 seconds)
- Use the pointed tip to blend around your nose and under your eyes. (30 seconds)
- Set with a light dusting of translucent powder if needed. (15 seconds)
Total time: under three minutes. That is faster than most brush routines and gives a smoother result.
Why This Works for All Skin Types
Oily skin benefits because the pressing motion does not disturb your natural oils as much as swiping does. Dry skin benefits because the damp sponge adds a touch of moisture and prevents flaking. Combination skin gets even coverage across both zones without needing two different application methods.
If you struggle with texture from acne scars or enlarged pores, this technique is especially effective. The bouncing motion fills in the uneven areas without settling into the depressions. It creates an optical blurring effect that makes imperfections less visible.
The Best Foundations to Pair With This Hack
While the technique works with most formulas, some foundations respond better than others. Look for these characteristics when choosing a product.
- A buildable, medium coverage formula. Full coverage foundations can look heavy if you apply too many layers.
- A natural or satin finish. Matte foundations can appear flat, while dewy formulas may look too shiny.
- A consistency that is not too thick. Thick creams are harder to press into the skin evenly.
For a list of affordable options that perform well with this method, read our roundup of the best drugstore foundations that rival high-end luxury brands. Many of them cost under $15 and work beautifully with the damp sponge technique.
The Final Step for Long-Lasting Wear
Once you have applied your foundation with the sponge, let it set for about 60 seconds before adding any powder or setting spray. This allows the product to bond with your skin. If you apply powder too soon, it can mix with the still-wet foundation and create a cakey layer.
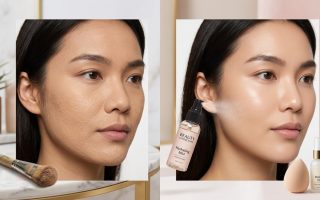
For a truly airbrushed look that lasts all day, finish with a fine mist of setting spray. Hold the bottle about eight inches from your face and spray in an X and T pattern. This locks everything in place without disturbing the finish you just created.
Your New Go-To Method
The makeup sponge airbrush finish is not a myth. It is a repeatable technique that anyone can do at home with a basic sponge and their regular foundation. The next time you do your makeup, take an extra minute to wet your sponge properly and bounce instead of swipe. You will see the difference immediately. Your skin will look smoother, your pores will appear smaller, and your foundation will last longer. Give it a try tomorrow morning. You might never go back to your old routine.