Self tanning at home sounds perfect until you catch a glimpse of those telltale orange streaks running down your legs or notice patchy spots on your ankles. You’re not alone. Most people who try self tanner end up with uneven results their first few times, but the problem isn’t the product. It’s almost always the application method.
Achieving a streak-free self tan requires proper skin preparation, the right application tools, and systematic technique. Exfoliate and moisturize dry areas 24 hours before tanning, apply product in circular motions using a mitt, and work in sections from legs to arms to face. Dilute the formula on hands, feet, elbows, and knees where color tends to concentrate. Wait at least 8 hours before showering for best results.
Why self tanner streaks in the first place
Understanding why streaking happens helps you prevent it. Self tanner contains DHA (dihydroxyacetone), which reacts with amino acids in your skin’s outer layer to create a brown color. When you apply too much product in one area, or when your skin surface is uneven from dry patches or leftover product buildup, the DHA concentrates in those spots and creates darker lines.
Dead skin cells are the main culprit. They absorb more DHA than fresh skin underneath, which is why areas that naturally shed slower (like ankles, knees, and elbows) tend to grab color more intensely.
Product formula matters too. Thicker mousses and creams can streak more easily than lighter gels or sprays if you don’t blend them properly. But lighter formulas often require more coats for visible color, so there’s a tradeoff.
Your application technique makes the biggest difference. Applying product in straight lines, using your bare hands, or skipping prep work will almost guarantee streaky results.
Preparing your skin 24 hours before application
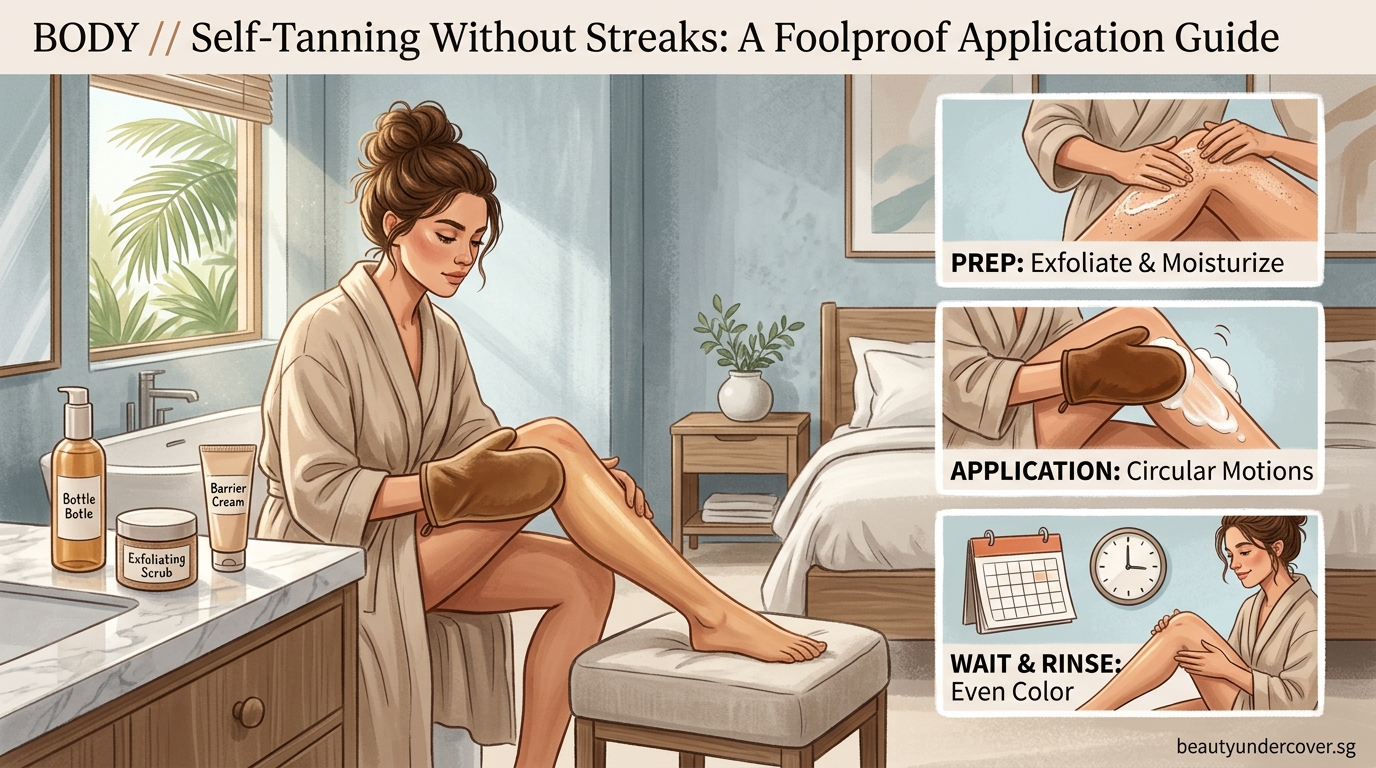
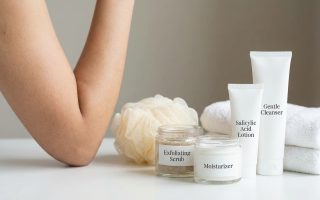
The work you do before you even open the self tanner bottle determines your final results. Start with a thorough exfoliation session at least 24 hours before you plan to tan.
Use a physical exfoliant like a body scrub or exfoliating gloves. Focus extra attention on rough spots: knees, elbows, ankles, heels, and the tops of your feet. These areas accumulate dead skin faster and will grab color more aggressively if you skip this step. Similar to how proper prep work matters for skincare, preparation makes all the difference in achieving smooth results.
Shave or wax at least 12 hours before tanning. Freshly shaved skin has open pores that can trap product and create tiny dark dots. Give your skin time to calm down first.
Moisturize dry areas the night before, but skip this step on the day of application. Your skin needs to be completely dry when you apply self tanner. Target these spots with extra hydration beforehand:
- Elbows and knees
- Ankles and heels
- Hands and cuticles
- Any areas with naturally dry or flaky skin
On application day, take a shower but don’t use any oils, lotions, or body products afterward. Pat yourself completely dry and wait 20 minutes before starting. Even slight dampness will dilute the formula and cause uneven color.
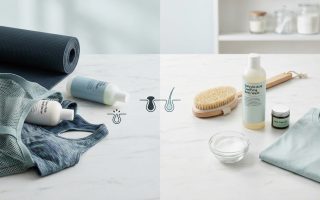
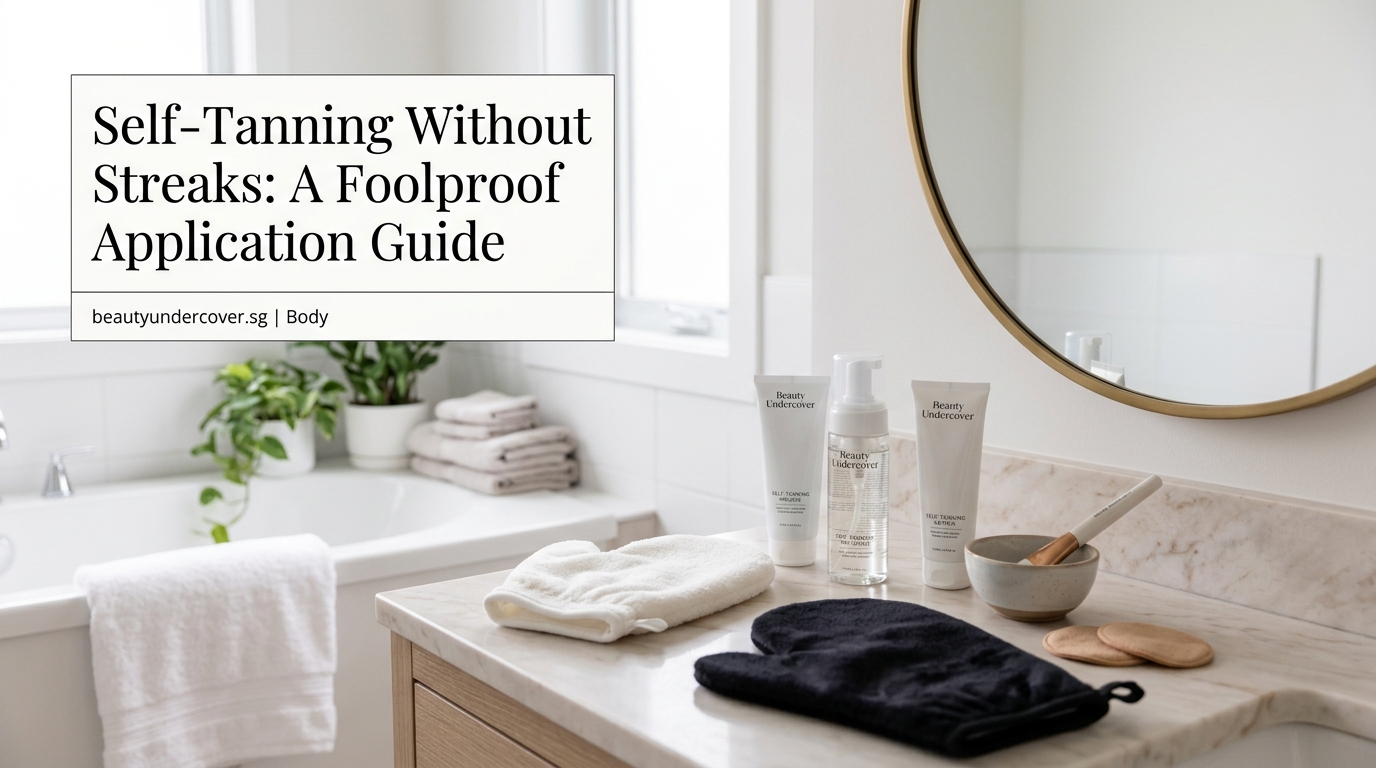
Choosing the right application tools
Your hands are not the right tool for applying self tanner. They’ll end up orange, and you won’t get the smooth, even coverage you need.
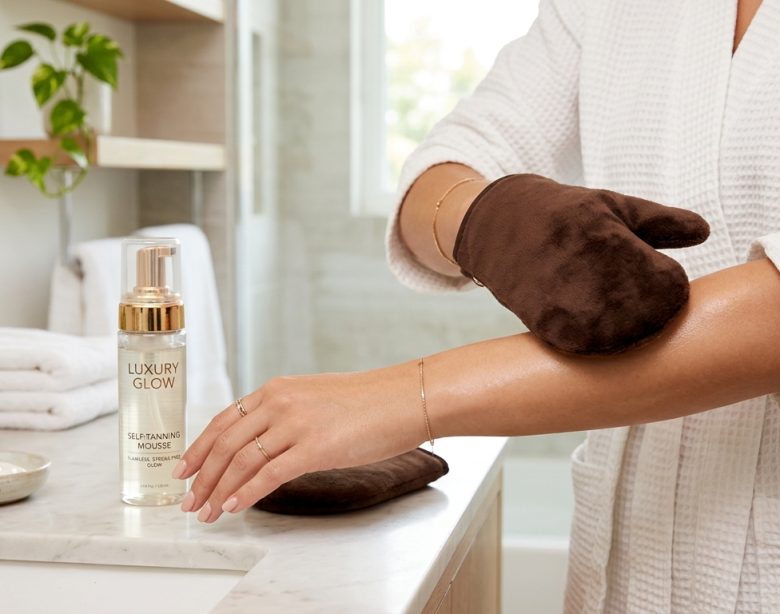
A self tanning mitt is essential. These velvet or microfiber applicators distribute product evenly and prevent your palms from absorbing color. They cost between $5 and $15 and last through dozens of applications.
For your back, you’ll need either a back applicator (a mitt attached to a long handle) or a trusted friend. Some people use a spray formula for their back and a mitt for everything else.
Latex gloves work in a pinch but don’t blend product as smoothly as mitts. If you use gloves, expect to spend more time buffing and blending.
For your face, consider using a separate, smaller applicator or a makeup sponge. Face skin is more delicate and visible, so you want precise control. Some people prefer using their hands for facial application, which works fine if you wash them immediately after.
Step by step application technique for your body
Start with your legs. This gives you practice on a large, relatively forgiving area before moving to trickier spots.
-
Pump or squeeze a small amount of self tanner onto your mitt. Start with less than you think you need. You can always add more.
-
Apply in circular motions, working your way up from your ankles to your thighs. Use light pressure and keep the mitt moving constantly. Never let it sit in one spot.
-
Blend thoroughly at your ankles and knees. These joints need extra attention. Use whatever product remains on your mitt after covering each section to lightly buff these areas.
-
Move to your arms next, starting at your wrists and working toward your shoulders. Use the same circular motion technique.
-
For your torso, work in vertical sections from your stomach to your chest. Blend carefully under your breasts and around your waistline where clothing will sit.
-
Dilute the product for your hands, feet, elbows, and knees. After applying to all major areas, use the leftover product on your mitt to very lightly sweep over these spots. Or mix a tiny amount of self tanner with regular moisturizer before applying to these areas.
The key is constant motion. Think of it like blending makeup for a seamless finish. You never want the product sitting still on your skin.
Handling difficult areas without creating dark patches
Certain body parts require special techniques to avoid obvious mistakes.
Hands and feet: These areas need the least amount of product. After finishing your body, take whatever residue remains on your mitt and lightly sweep it across the tops of your hands and feet. Skip your palms and soles entirely. Immediately wash your palms with soap, then use a damp towel to blend the color on the backs of your hands between your fingers.
Knees and elbows: Bend these joints while applying product to the surrounding area, then straighten them and use a nearly dry mitt to buff the joint itself. This prevents product from settling into creases.
Ankles: The ankle bone and Achilles tendon area grabs color intensely. Apply your main layer to your leg, stopping about two inches above your ankle. Then use the faintest amount of product to blend down to your foot.
Back of thighs and bottom: These areas are hard to see, so use a mirror or apply by feel. The back of your thighs typically needs the same amount as the front. Your bottom usually needs slightly less since the skin there is often smoother.
“The biggest mistake people make is using too much product on areas that naturally have less surface area or thicker skin. Your hands and feet should get maybe 10% of what your legs get.” – Celebrity spray tan artist Jules Von Hep
Applying self tanner to your face correctly
Facial application requires a lighter touch and more precision. Your face has different skin textures, oil production levels, and visibility than your body.
Prep your face the same way you prepped your body, but use a gentler exfoliant. A chemical exfoliant with AHAs can work better than a scrub for facial skin. Just like understanding which products go where in your routine, knowing when to apply self tanner to your face matters too.
Apply a thin layer of moisturizer to your eyebrows, hairline, and jawline before tanning. This creates a barrier that prevents color from staining hair or settling into fine lines.
Use half the amount of product you’d use for one leg. Start at the center of your face and blend outward toward your hairline and down your neck. Don’t forget your ears if they’re visible, but use an extremely light hand.
Blend your jawline and neck carefully to avoid a mask-like appearance. Your neck should match your face, and your face should match your chest. This might mean applying a light layer to your neck and upper chest area as well.
Let your face dry completely before lying down or touching it. This takes about 10 minutes.
Common mistakes that cause streaks and how to avoid them
| Mistake | Why it causes streaks | How to fix it |
|---|---|---|
| Applying too much product at once | Excess formula pools in skin creases and creates dark lines | Use less product and build color gradually with multiple thin layers |
| Not exfoliating beforehand | Dead skin cells absorb more DHA and create patchy dark spots | Exfoliate 24 hours before every application |
| Using bare hands | Palms absorb product and don’t distribute it evenly | Always use a tanning mitt or applicator |
| Rushing the application | Product doesn’t get blended properly before it starts developing | Take your time and work in good lighting |
| Applying to damp skin | Water dilutes the formula unevenly | Wait 20 minutes after showering and ensure skin is bone dry |
| Wearing tight clothes immediately | Fabric rubs against developing tan and creates lines | Wear loose, dark clothing for at least 4 hours after application |
Another common error is applying self tanner right after using certain skincare products. Active ingredients like retinol or acids can interfere with DHA development. If you use these products regularly, apply them at night and tan in the morning, or skip them the day you plan to tan.
What to do immediately after application
The first few hours after applying self tanner are critical for achieving even results.
Stay dry. Don’t shower, swim, or sweat heavily for at least 8 hours. Most formulas recommend waiting 8 to 12 hours before your first shower. The longer you wait, the deeper the color will develop.
Avoid sitting or lying down for at least 20 minutes. Let the product dry completely while standing or moving around. Once it’s dry to the touch, you can sit carefully, but avoid activities that cause friction against your skin.
Wear loose, dark clothing. Tight clothes can rub against your skin and create lines. Dark colors won’t show any product transfer. Old pajamas or a dark robe work perfectly.
Don’t apply deodorant, perfume, or other products until after your first shower. These can interfere with color development or create splotchy areas.
Sleep on dark sheets if you’re tanning before bed. Some product may transfer overnight even after it feels dry.
When you do shower, use lukewarm water and a gentle body wash. Pat yourself dry instead of rubbing vigorously. Your tan will continue developing for up to 24 hours after application.
Building color gradually with multiple applications
One heavy coat of self tanner rarely looks natural. Building color over two or three applications creates more realistic, forgiving results.
Start with a light or medium shade formula for your first application. See how it develops over 24 hours before deciding if you want to go darker.
Wait at least 24 hours between applications. This gives the first layer time to fully develop and lets you see your true color. If you apply a second coat too soon, you won’t know how dark you’ll end up.
For your second application, you can use the same shade or go one shade darker. Follow the same prep and application steps as your first session.
Most people find that two light applications look better than one heavy application. The color appears more even, fades more naturally, and gives you better control over the final shade.
If you’re maintaining an existing tan, you can apply self tanner every 3 to 5 days to keep your color consistent. Touch up areas that fade faster (like your arms and legs) more frequently than areas that hold color longer (like your torso).
Maintaining your tan and making it last longer
A good self tan typically lasts 5 to 7 days before it starts fading noticeably. You can extend this with proper care.
Moisturize daily. Hydrated skin holds color longer than dry skin. Apply a fragrance-free body lotion every morning and night. The same principle applies here as keeping your skin barrier healthy – proper hydration is essential.
Avoid hot baths and long showers. Hot water strips color faster than lukewarm water. Keep showers under 10 minutes when possible.
Pat your skin dry instead of rubbing. Aggressive towel drying removes color and creates uneven fading.
Skip heavy exfoliation while maintaining your tan. Light exfoliation is fine, but aggressive scrubbing will strip your color quickly.
Use a tan extender or gradual tanning lotion. These products contain a small amount of DHA that deposits subtle color while moisturizing. They help your tan fade more evenly and extend the time between full applications.
When your tan starts fading unevenly, exfoliate and start fresh rather than trying to patch over faded areas. Applying self tanner over a patchy existing tan will only make the unevenness more obvious.
Fixing mistakes and removing unwanted color
Even with careful application, mistakes happen. Here’s how to fix them.
For immediate fixes (within 30 minutes of application):
- Use a damp towel with a small amount of body wash to gently buff away excess product
- Focus on areas that look too dark or have visible lines
- Blend the edges where you removed product so there’s no harsh line
For mistakes you notice after the color develops:
- Soak in a warm bath with baking soda (about 1/4 cup in a full tub)
- Use a body scrub or exfoliating mitt to gently remove color from dark areas
- Apply lemon juice to stubborn spots, let it sit for 10 minutes, then scrub
- Use a tan remover product specifically designed for this purpose
For orange tones (which indicate you used too much product or chose the wrong shade):
- Exfoliate thoroughly to remove as much color as possible
- Wait for the tan to fade naturally over 3 to 5 days
- Choose a cooler-toned or lighter formula for your next application
Prevention is easier than correction. Take your time during application, use good lighting, and check your work from multiple angles before the product dries.
Choosing the right formula for your skin type
Different self tanner formulas work better for different skin types and experience levels.
Mousse: The most popular formula. Easy to see where you’ve applied it, dries relatively fast, and works well for most skin types. Best for beginners.
Lotion: Hydrating and good for dry skin, but can take longer to dry. Harder to see where you’ve applied it, which increases streak risk.
Gel: Lightweight and good for oily skin. Dries fast but can be tricky to blend. Better for experienced users.
Spray: Convenient for hard-to-reach areas like your back. Can be messy and harder to control. Often works best combined with another formula.
Gradual tanning lotion: Contains a small amount of DHA mixed with moisturizer. Builds color slowly over multiple days. Nearly impossible to streak but takes longer to see results.
For your first few attempts, choose a mousse formula in a light or medium shade. These are the most forgiving and easiest to apply evenly. You can always go darker once you’ve mastered the technique.
Consider your natural skin tone when choosing a shade. Fair skin looks best with light to medium formulas. Medium skin can use medium to dark formulas. Deeper skin tones need dark or extra dark formulas to see visible color change.
Getting that sun-kissed look without the orange tone
Orange self tanner results from choosing the wrong shade or using too much product. Here’s how to achieve a natural, sun-kissed color instead.
Choose a formula with a green or violet base. These undertones neutralize orange and yellow tones, creating a more natural brown color. Many modern self tanners advertise “no orange” or “olive” formulas.
Start lighter than you think you need. You can always build darker, but you can’t easily lighten an overly dark application.
Consider your natural undertones. If you have cool undertones (pink or red), choose a self tanner with violet or ash undertones. If you have warm undertones (yellow or golden), choose a formula with olive or green undertones.
Apply less product to your face than your body. Facial skin often develops darker than body skin with the same amount of product. Your face should be slightly lighter than your body for the most natural look.
Test new products on a small area first. Apply self tanner to your inner arm or hip and wait 24 hours to see how the color develops on your skin before doing your whole body.
Natural-looking color comes from building gradually. Two light applications will always look more realistic than one heavy application, even if they end up the same shade.
Your path to perfect, streak-free results every time
Mastering streak-free self tanning takes practice, but following these steps removes most of the guesswork. The key is proper preparation, using the right tools, and taking your time during application.
Start with thorough exfoliation 24 hours before tanning. Use a mitt instead of your hands. Apply in circular motions with constant movement. Use less product on areas that naturally grab color. Build your tan gradually over multiple applications rather than trying to get dark in one session.
Your first attempt might not be perfect, and that’s completely normal. Each application teaches you how your skin responds to self tanner and where you need to pay extra attention. Most people see dramatic improvement by their third or fourth try.
The confidence that comes from a natural-looking, even tan makes the effort worthwhile. You’ll save money on spray tan appointments, avoid UV damage from sun exposure, and have complete control over your color. With these techniques, you can achieve professional-looking results from the comfort of your own home.