You’ve invested in a cabinet full of serums, treatments, and creams. But are you applying them in the right order? The sequence matters more than you think. Layering your nighttime skincare incorrectly can block absorption, waste product, and leave your skin confused about what to do first.
Nighttime skincare layering follows a simple rule: apply products from thinnest to thickest consistency. Start with cleansing, then apply water-based products like toners and essences, followed by treatment serums, oils, and finally your moisturizer. Wait 30 to 60 seconds between layers to allow proper absorption. This sequence ensures each product penetrates effectively without creating a barrier that blocks what comes next.
The science behind product layering
Your skin has a natural barrier designed to keep things out. That’s great for protecting you from bacteria and pollution, but it also means your skincare products need help getting in.
Molecular size determines absorption speed. Smaller molecules penetrate faster and deeper. Larger molecules sit on the surface longer, creating a protective layer.
When you apply a thick cream first, you create a wall. Water-based serums applied afterward can’t break through that barrier. They sit on top, evaporate, and never reach your skin.
The thinnest-to-thickest rule works with your skin’s biology, not against it. Each layer prepares the surface for what comes next.
Your complete nighttime layering routine
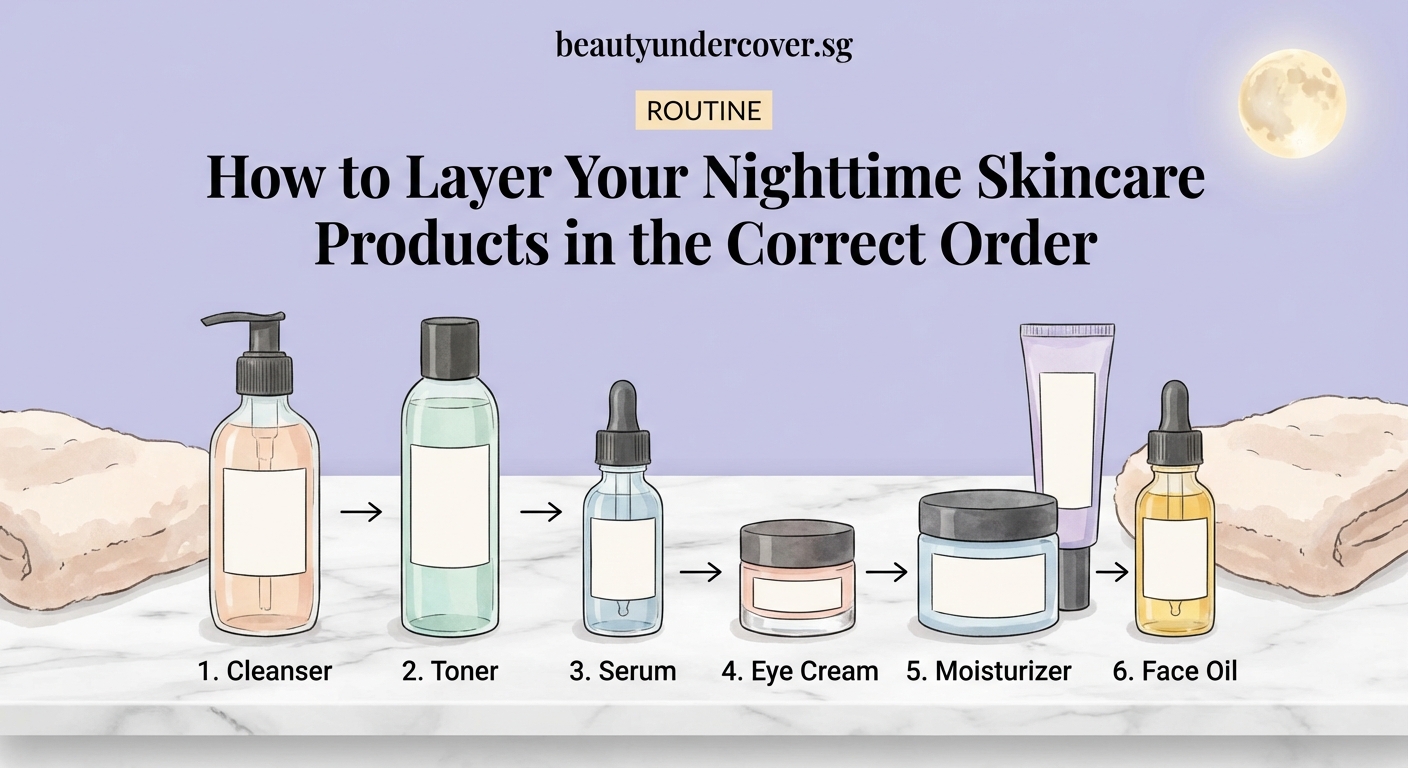
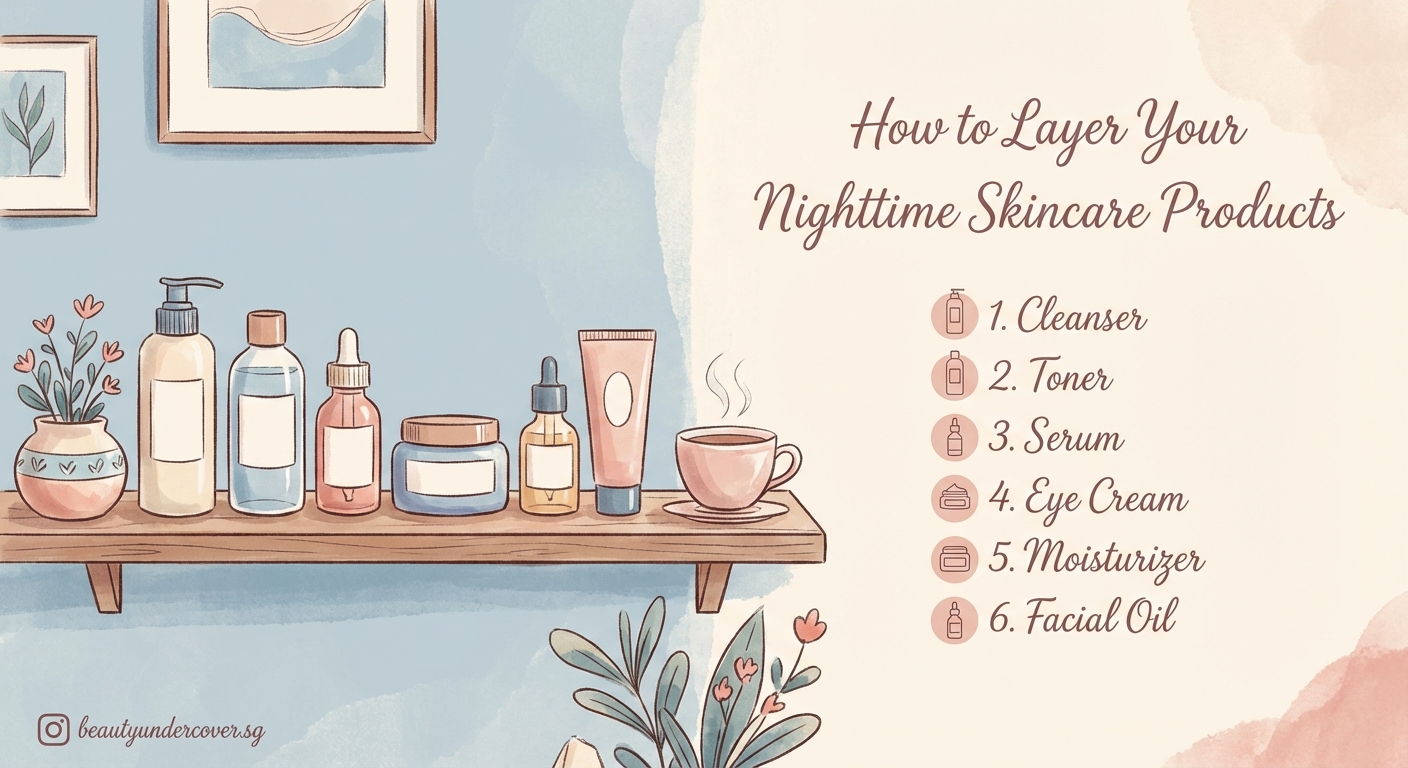
Here’s the exact order to follow every evening:
- Oil-based cleanser or balm to remove makeup, sunscreen, and oil-based debris
- Water-based cleanser to clean your skin without stripping it
- pH-balancing toner to reset your skin after cleansing
- Essence or treatment toner for hydration and prep
- Targeted serums applied from thinnest to thickest
- Eye cream to address the delicate area around your eyes
- Facial oil if you use one (optional)
- Moisturizer to seal everything in
- Sleeping mask or occlusive for extra hydration (optional)
Not everyone needs every step. Choose what your skin actually needs, not what looks impressive on a shelf.
Why double cleansing starts everything right
Your evening routine begins with a clean canvas. One cleanse doesn’t cut it if you’ve worn sunscreen or makeup.
The first cleanse removes oil-based products. Use a cleansing balm, oil, or micellar water. Massage it onto dry skin for 60 seconds. This breaks down everything that water alone can’t touch.
The second cleanse actually cleans your skin. Use a gentle gel, foam, or cream cleanser. This removes sweat, dirt, and any remaining residue from your first cleanse.
Skip the double cleanse and you’re layering expensive serums on top of sunscreen remnants. That’s like painting a wall without priming it first.
Toners and essences prepare your skin
Toners got a bad reputation in the 90s when they were all alcohol-heavy and harsh. Modern toners are completely different.
A pH-balancing toner brings your skin back to its natural acidic state after cleansing. Most cleansers are alkaline, which temporarily disrupts your skin barrier. A toner fixes that in seconds.
Essences are thicker than toners but thinner than serums. They add a layer of hydration and often contain fermented ingredients or hyaluronic acid.
Pat these products in with your hands. Cotton pads waste product and can irritate sensitive skin. Use 2 to 3 drops or a coin-sized amount.
Serums deliver concentrated ingredients
This is where your active ingredients live. Serums contain higher concentrations of beneficial compounds than any other product type.
Apply serums from thinnest to thickest consistency. If you’re not sure, hold two bottles upside down and see which one drips faster. That one goes first.
Common nighttime serums and their order:
- Hyaluronic acid serum (very thin, goes first)
- Niacinamide serum (medium thickness)
- Peptide serum (medium to thick)
- Retinol or retinoid (can vary, but usually after water-based serums)
Don’t layer too many serums at once. Your skin can only absorb so much. Three serums maximum per routine gives you results without overwhelming your barrier.
“Think of your skin like a sponge. It can only hold so much water before it starts dripping. The same applies to serums. More products doesn’t mean better results. It often means wasted product and potential irritation.” — Board-certified dermatologist Dr. Whitney Bowe
The retinol question everyone asks
Retinol confuses people more than any other ingredient. Should it go before or after moisturizer?
For most people, retinol goes after serums but before moisturizer. Apply it to completely dry skin. Any dampness increases penetration, which sounds good but actually increases irritation.
If you’re new to retinol or have sensitive skin, try the sandwich method. Apply a thin layer of moisturizer first, then retinol, then another layer of moisturizer. This buffers the retinol and reduces irritation without killing its effectiveness.
Wait 20 to 30 minutes after washing your face before applying retinol. This ensures your skin is totally dry.
Eye cream placement matters less than you think
The beauty industry has strong opinions about when to apply eye cream. Some say before moisturizer, others say after.
The truth? It doesn’t matter as much as the marketing suggests. Eye creams are formulated to work in the eye area regardless of when you apply them.
That said, most dermatologists recommend applying eye cream before your face moisturizer. This prevents you from accidentally dragging heavy face cream into the delicate eye area.
Use your ring finger to apply eye cream. It’s your weakest finger, so you’re less likely to tug or pull the thin skin around your eyes.
Oils and moisturizers seal everything in
Facial oils are optional, but they work beautifully for dry skin types. They go after serums but before or after moisturizer, depending on the oil weight.
Light oils like squalane or rosehip can go before moisturizer. Heavy oils like marula or argan should go after, as the final sealing step.
Your moisturizer is the protective layer that keeps all those serums from evaporating overnight. Choose a formula that matches your skin type:
- Gel moisturizers for oily skin
- Lotion or cream for normal to combination skin
- Rich cream or balm for dry skin
Don’t skip moisturizer even if you have oily skin. Dehydrated skin often produces more oil to compensate.
Common layering mistakes to avoid
| Mistake | Why it’s a problem | Better approach |
|---|---|---|
| Applying retinol on damp skin | Increases irritation and redness | Wait until skin is completely dry |
| Using too many actives at once | Overwhelms skin barrier | Alternate nights or use different actives AM vs PM |
| Not waiting between layers | Products mix together and don’t absorb | Wait 30 to 60 seconds between each step |
| Applying thick products first | Creates a barrier that blocks absorption | Always go thin to thick |
| Rubbing products in aggressively | Causes irritation and tugging | Pat or press products into skin gently |
How long to wait between each layer
This is where people get impatient. You want to finish your routine and get to bed, not stand in your bathroom for 20 minutes.
The minimum wait time between layers is 30 seconds. That’s enough for most products to start absorbing.
For actives like vitamin C or retinol, wait a full minute. These ingredients need time to penetrate before you add another layer on top.
You don’t need to wait until each product is completely dry. Your skin should still feel slightly tacky when you move to the next step. That tackiness means there’s still moisture present, which helps the next product spread and absorb.
Set a timer on your phone if you tend to rush. Use those 60 seconds to brush your teeth or put away your makeup.
Adjusting your routine for different skin concerns
Your layering order stays the same, but the products you choose change based on what your skin needs.
For acne-prone skin:
– Add a salicylic acid toner after cleansing
– Use a niacinamide serum to control oil
– Apply a lightweight gel moisturizer
– Consider benzoyl peroxide as a spot treatment after serums
For dry, dehydrated skin:
– Layer multiple hydrating toners or essences
– Use a hyaluronic acid serum on damp skin
– Add a facial oil before moisturizer
– Finish with a sleeping mask for extra overnight hydration
For anti-aging concerns:
– Use a vitamin C serum in the morning instead of night
– Apply retinol or a retinoid after serums
– Add a peptide serum for collagen support
– Use a richer moisturizer with ceramides
For sensitive skin:
– Skip actives on nights when your skin feels reactive
– Use a gentle, fragrance-free routine
– Apply products to damp skin to dilute them slightly
– Keep your routine simple with fewer steps
What to do when you add a new product
Don’t overhaul your entire routine at once. Add one new product at a time and wait two weeks before introducing another.
This lets you identify exactly what’s helping and what’s causing problems. If you add three new products in one week and break out, you won’t know which one caused it.
Start new actives slowly. Use retinol twice a week for the first two weeks, then increase to every other night, then nightly if your skin tolerates it.
The same goes for acids, vitamin C, and other potent ingredients. Your skin needs time to build tolerance.
Seasonal adjustments keep your skin balanced
Your skin changes with the weather, so your routine should too.
In winter, you might need:
– A richer cleanser that doesn’t strip
– Extra hydrating layers
– A heavier moisturizer or facial oil
– A humidifier in your bedroom
In summer, you might prefer:
– A lighter gel cleanser
– Fewer serum layers
– A lightweight moisturizer
– Skipping facial oils altogether
Listen to your skin. If your winter routine feels too heavy in July, scale back. If your summer routine leaves you tight and flaky in January, add more moisture.
Making your routine actually stick
The best skincare routine is the one you’ll actually do. A 12-step routine that you follow twice a month won’t beat a simple 5-step routine you do every night.
Start with the basics:
– Cleanser
– One serum that addresses your main concern
– Moisturizer
Once that becomes automatic, add more steps. But only if you genuinely enjoy them and see results.
Keep your products visible. Store them in the order you use them. This removes decision fatigue when you’re tired at night.
Set a reminder on your phone for the first month. After 30 days, it becomes habit.
Your skin will tell you what’s working
Pay attention to how your skin feels in the morning. It should look plump, smooth, and calm. Not tight, red, or irritated.
If you wake up with dry patches, add more hydration or a richer moisturizer. If you wake up oily, reduce heavy creams or oils.
Peeling or flaking usually means you’re using too many actives or not enough moisture. Scale back on retinol or acids and boost your hydration layers.
Take photos in the same lighting every two weeks. Your eyes adjust to gradual changes, but photos don’t lie. You’ll see improvements you might otherwise miss.
Building a routine that works for your life
You don’t need to layer 10 products every single night. Some nights you’ll be exhausted. Some nights you’ll get home late.
Have a minimal routine for those nights:
– Cleansing balm or micellar water
– Moisturizer
That’s it. Two steps are infinitely better than sleeping in your makeup because a 9-step routine felt overwhelming.
Save your full routine for nights when you have time and energy. Consistency matters more than perfection.
Your skin won’t fall apart if you skip your essence once in a while. But it will suffer if you regularly skip cleansing or moisturizing.
Making every layer count
Skincare layering isn’t complicated once you understand the basic principle. Thin to thick. Water-based before oil-based. Actives on clean, dry skin.
You don’t need every product that exists. You need the right products in the right order for your specific skin.
Start tonight with what you have. Arrange your products by consistency. Apply them in order. Wait between layers. Your skin will show you the results.