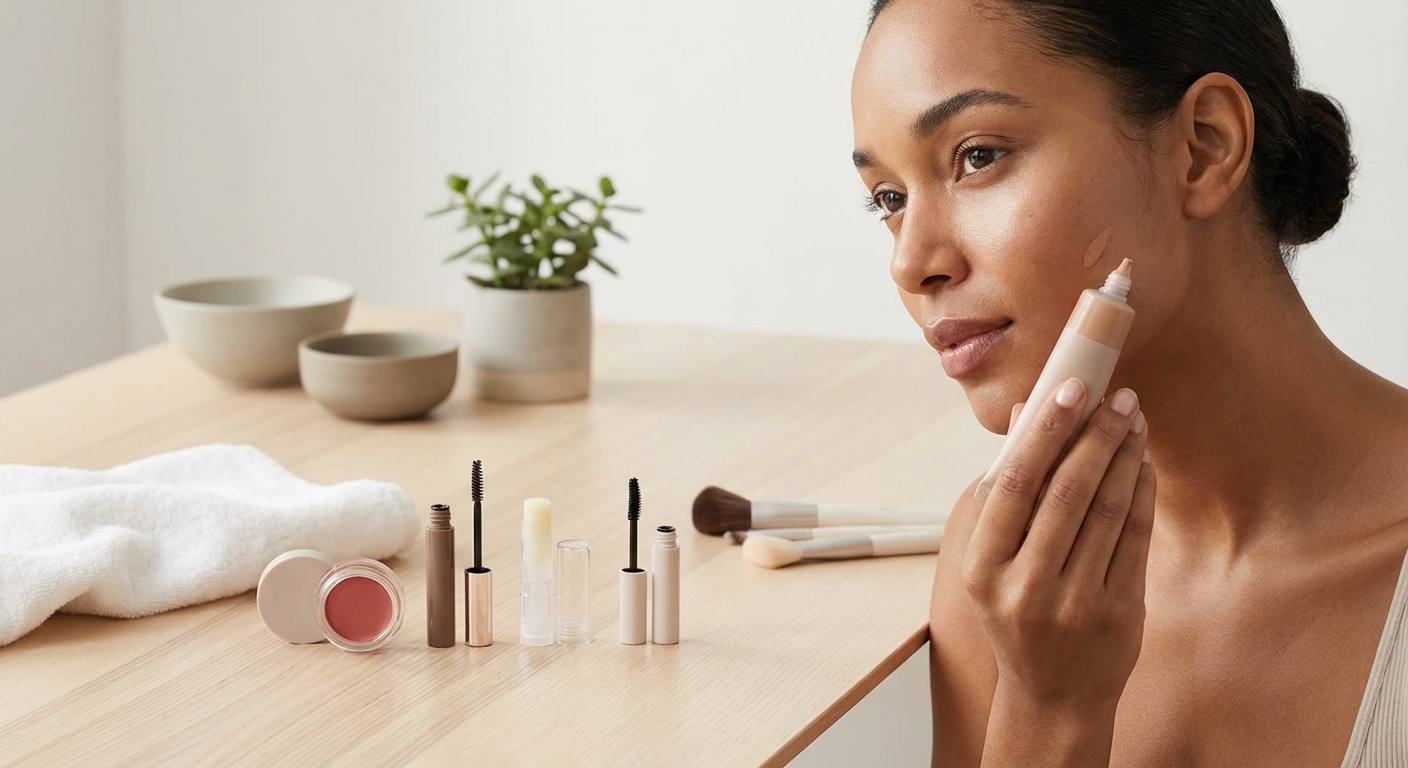
You want to look polished without looking painted. That’s the magic of a no makeup makeup look. It’s the art of appearing like you rolled out of bed with perfect skin, bright eyes, and a natural glow, even though you’ve strategically applied products to get there.
A no makeup makeup look focuses on enhancing your natural features rather than transforming them. The goal is to even out skin tone, add subtle definition to eyes and brows, and create a healthy glow using lightweight products and strategic application techniques. This approach works perfectly for everyday situations where you want to look put together without appearing overly made up.
Understanding the philosophy behind natural makeup
The no makeup makeup look isn’t about skipping makeup entirely. It’s about choosing the right products and applying them with restraint.
Think of it as enhancement rather than coverage. You’re working with your natural features instead of against them.
This approach celebrates your skin texture, freckles, and natural coloring. The goal is to look like the best version of yourself on a really good day.
Most people won’t be able to tell you’re wearing makeup. They’ll just think you look well rested and healthy.
The technique requires more precision than a full glam look. Every product needs to blend seamlessly into your skin.
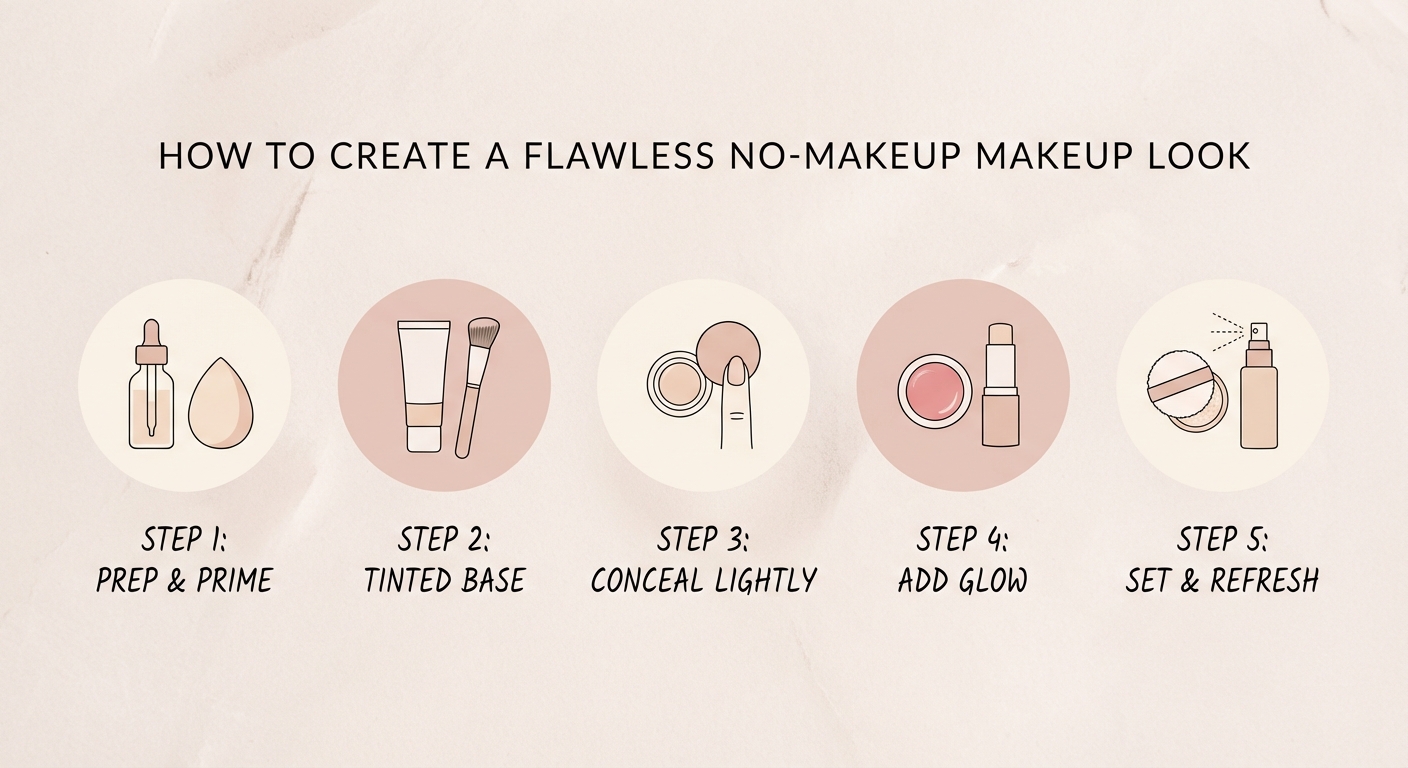
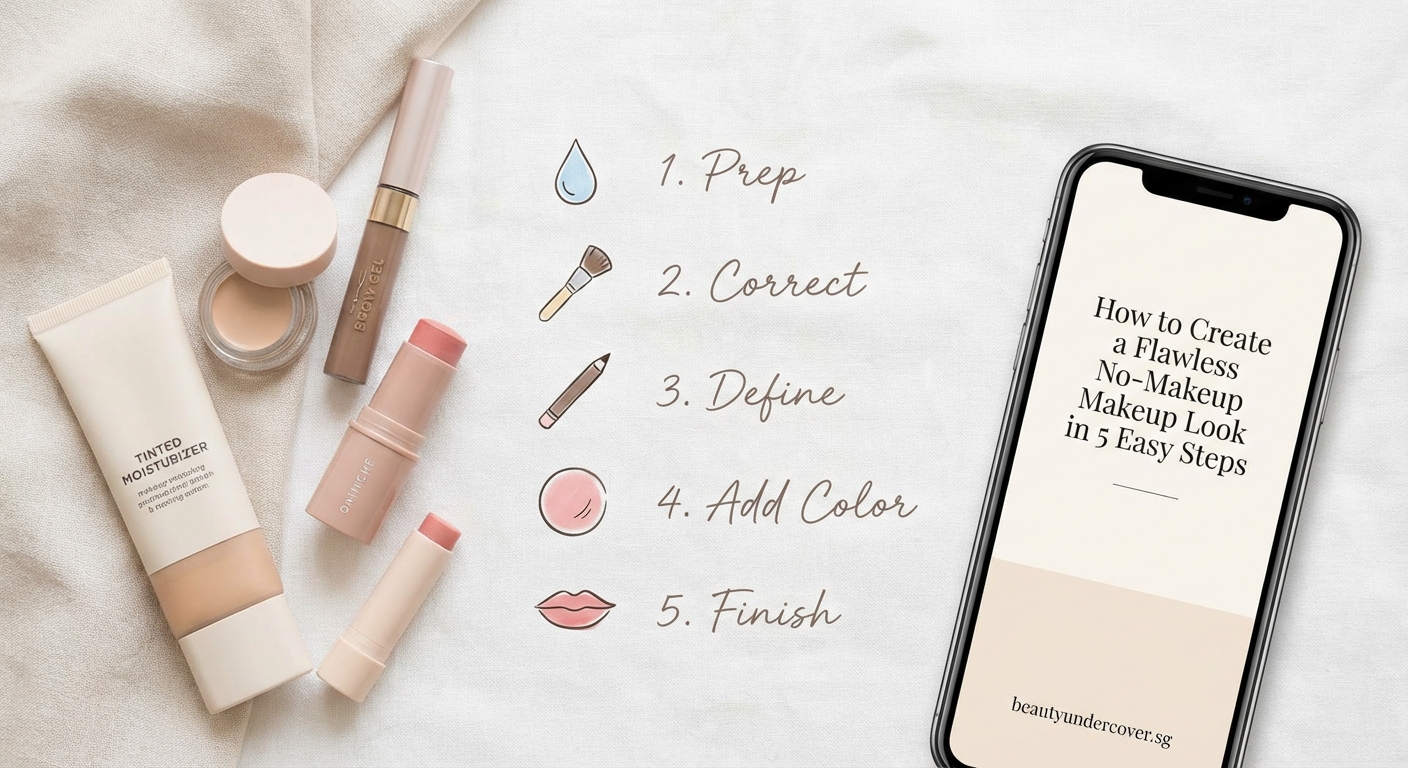
Step 1: Prep your canvas with smart skincare
Great makeup starts with great skin preparation. Skip this step and your products won’t sit right.
Start with a clean face. Use your regular cleanser and pat dry gently.
Apply a lightweight moisturizer suited to your skin type. Give it three to five minutes to absorb fully before moving forward.
If you have specific concerns like redness or dark circles, use a targeted treatment now. A color correcting primer can neutralize discoloration without adding heavy coverage.
Sunscreen is non negotiable. Choose a formula that doesn’t leave a white cast or greasy finish. Many people skip this because they worry about pilling under makeup, but the right formula will work beautifully.
“The secret to natural looking makeup is starting with hydrated, prepped skin. When your base is right, you need far less product to achieve a flawless finish.” – Professional Makeup Artist
Consider using a hydrating face mist if your skin feels tight. This adds an extra layer of moisture that helps makeup blend more naturally.
Step 2: Create an even base without heavy coverage
Foundation is where most people go wrong with natural makeup. Heavy coverage screams “I’m wearing makeup.”
Choose a tinted moisturizer, BB cream, or lightweight foundation. These products even out your skin tone without masking it completely.
Application method matters enormously. Use your fingers, a damp beauty sponge, or a stippling brush. These tools create a more skin-like finish than traditional foundation brushes.
Apply product only where you need it. Most people don’t need full face coverage.
Focus on the center of your face where redness and discoloration tend to concentrate. Blend outward, using less product as you move toward your hairline and jawline.
Your freckles and natural skin texture should still show through. If they’ve disappeared, you’ve used too much product.
For blemishes or dark spots that need extra attention, use a concealer that matches your skin tone exactly. Dab it on with your ring finger and blend the edges carefully.
Set your base with a light dusting of translucent powder only on areas that get oily. Skip powder entirely if you have dry skin.
Step 3: Add dimension with subtle contouring and color
A completely flat face looks unnatural. You need some dimension to appear truly makeup free.
Cream products work better than powders for this step. They blend into skin more seamlessly and create a natural looking shadow or flush.
For bronzer, choose a shade only one or two tones deeper than your natural skin. Apply it where the sun would naturally hit: temples, cheekbones, and along your jawline.
Use a light hand. You can always add more, but removing excess product disrupts your base.
Blush brings life back to your face. Cream or liquid formulas in soft pink, peach, or berry tones work beautifully.
Smile and apply blush to the apples of your cheeks, blending upward toward your temples. This mimics a natural flush.
For highlighter, forget the intense metallic shimmers. Choose a subtle champagne or pearl shade.
Apply highlighter to the high points of your face: cheekbones, bridge of nose, cupid’s bow, and brow bone. Use your finger for the most natural application.
| Technique | Natural Look | Common Mistake |
|---|---|---|
| Base application | Sheer coverage, skin texture visible | Full coverage foundation everywhere |
| Bronzer placement | Subtle warmth on temples and cheeks | Heavy contour lines under cheekbones |
| Blush intensity | Soft flush that mimics natural color | Bright, obvious stripes of color |
| Highlighter finish | Subtle glow from within | Glittery, obvious shimmer |
| Powder usage | Minimal, only on oily zones | Heavy powder all over face |
Step 4: Define your eyes without obvious makeup
Eyes need definition to look awake, but heavy eyeshadow ruins the natural effect.
Start with your brows. Well groomed brows frame your face and make you look more polished.
Use a brow pencil or powder one shade lighter than your natural brow color. Fill in sparse areas with light, hair-like strokes.
Brush through with a spoolie to soften and blend. Set with a clear or tinted brow gel.
For eyeshadow, stick to neutral tones that match your skin. Soft browns, taupes, and warm beiges work for most people.
Apply a light matte shade all over your lid. Add a slightly deeper shade to your crease for subtle dimension.
Skip the lower lash line entirely or use just a hint of the crease shade for definition.
Eyeliner should be subtle. Brown or taupe pencil works better than black for this look.
Tightline your upper waterline to make lashes look fuller without an obvious liner. If you want a bit more definition, create a thin line close to your lashes and smudge it slightly.
Mascara is essential but requires restraint. One coat of brown or brown-black mascara looks more natural than multiple coats of jet black.
Wiggle the wand at the base of your lashes and sweep through to the tips. Focus on your upper lashes and skip the lower ones, or use just a light touch there.
If you have very light lashes, consider getting them tinted professionally. This eliminates the need for mascara entirely while still providing definition.
Step 5: Perfect your lips with barely there color
Bold lips don’t belong in a no makeup makeup look. Your lips should look naturally healthy and hydrated.
Start with a lip balm to smooth and moisturize. Let it absorb for a minute.
Choose a lip product in a shade close to your natural lip color. Tinted lip balms, sheer lipsticks, or lip stains work perfectly.
Look for descriptions like “my lips but better” or MLBB when shopping. These shades enhance rather than transform.
- Soft pink for fair skin tones
- Peachy nude for medium skin tones
- Berry or mauve for deeper skin tones
- Sheer formula for all skin tones
Apply with your finger for the most natural finish. This deposits less product and creates a stained effect.
Blot lightly with a tissue if the color looks too intense. You want just a hint of color.
Skip lip liner entirely. Defined edges look too deliberate for this aesthetic.
If your lips are naturally very pigmented, you might not need any product at all. Just use a nourishing balm for a healthy sheen.
Product selection makes or breaks the look
Not all makeup works for a natural aesthetic. Your product choices determine your success.
Texture matters more than brand names. Lightweight, blendable formulas are essential.
For base products, look for words like sheer, natural, radiant, or skin-like on the packaging. Avoid anything labeled full coverage or matte.
Cream and liquid products generally look more natural than powders. They melt into skin instead of sitting on top.
Choose products with skincare benefits. Makeup with hyaluronic acid, vitamins, or SPF improves your skin while you wear it.
Test products in natural light before buying. Store lighting can be deceiving.
Swatch on your jawline, not your hand. Your face and hands are different colors.
Build a small collection of multi-use products. A cream blush can work on lips. A bronzer can warm up your eyelids.
Common mistakes that ruin the natural effect
Even with the right products, application errors can make you look obviously made up.
Using too much product is the biggest mistake. Start with less than you think you need.
Forgetting to blend is a close second. Every product needs to melt seamlessly into your skin.
Mismatched foundation creates a mask effect. Your face should be the same color as your neck and chest.
Overly groomed brows look unnatural. Some asymmetry and texture is normal and desirable.
Skipping skincare leads to cakey, separated makeup. Hydration is the foundation of this look.
Using the wrong tools creates texture. Clean brushes and sponges are essential for smooth application.
Applying makeup in poor lighting causes mistakes you’ll only notice later. Use natural light whenever possible.
Ignoring your undertones leads to unflattering color choices. Cool tones need different shades than warm tones.
Adjusting the look for different occasions
A no makeup makeup look works almost everywhere, but you might need slight adjustments.
For work or professional settings, keep everything as described. This look reads as polished and appropriate.
For casual weekend activities, you can skip even more. Just concealer, brow gel, and tinted lip balm might be enough.
For photos or video calls, add slightly more definition. Cameras tend to wash out features.
Increase your bronzer and blush application by about 20 percent. Add a touch more mascara.
For evening events, you can intensify without losing the natural vibe. Use a slightly deeper lip color or add a thin line of eyeliner.
The key is maintaining the overall philosophy. You’re still enhancing, not transforming.
Maintaining your look throughout the day
Natural makeup should last without constant touch-ups.
Blotting papers control oil without adding more product. Press gently on shiny areas.
A hydrating mist refreshes makeup and adds dewiness. Spray lightly from arm’s length.
Keep your lip product handy for reapplication. Lips fade faster than other areas.
Avoid touching your face. Oils from your hands break down makeup.
If you need more coverage later, use a light hand with concealer rather than adding foundation.
Making this your everyday beauty routine
The no makeup makeup look becomes faster with practice. What takes 20 minutes now will take 10 minutes in a few weeks.
Establish a consistent routine. Use the same products in the same order until it becomes automatic.
Prep the night before. Clean brushes, organize products, and do your evening skincare so morning application is smooth.
Invest in good lighting at your makeup station. You’ll make better decisions and work more efficiently.
Take photos of yourself regularly. This helps you see what’s working and what needs adjustment.
Don’t be afraid to skip steps on low-key days. The beauty of this approach is its flexibility.
Your natural beauty, amplified
Learning to create a no makeup makeup look gives you confidence for any situation. You’ll look polished at work, fresh at the gym, and camera ready without the stress of a full face.
The techniques you’ve learned here work with your features instead of covering them up. Practice the steps, adjust for your unique coloring and preferences, and soon this will become your go-to routine. Start with just a few products and build from there. Your most beautiful look is the one that makes you feel like yourself.
Leave a Reply